Monday, December 17, 2012

Chocolate for the Holidays

This time of year is one of my favorite times of year. Yes, it's cold out and I prefer summer, but I love the holidays. Mostly I love the holidays because I get to see family and friends that I don't get to see very often. But I also love the holidays for all the goodies (maybe my waistline hates me for it, but I can't resist). I found two recipe ideas on pinterest that I wanted to give a try. Both were very delicious so I wanted to share: Chocolate Crinkle Cookies (these babies are like brownies in cookie form) and Chocolate Dipped S'mores.

Chocolate Crinkle Cookies


Ingredients
2 cups sugar
3/4 cup vegetable oil
1 cup unsweetened cocoa
4 eggs
2 tsp vanilla extract
2 1/3 cups flour
2 tsp baking soda
1/2 tsp salt
powdered sugar for rolling

Directions
1. Combine sugar, oil, and cocoa in a large bowl. Beat until well blended.
2. Beat in eggs and vanilla.
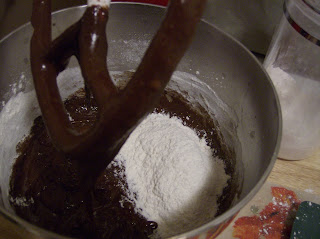
3. In a small bowl, combine flour, baking powder, and salt. Slowly add to coca mixture, beating well.
4. Cover and refrigerate dough until it's firm enough to handle. You can place it in the freezer if you want it to firm up quicker. (I put my dough in the freezer for 10-15 minutes and it was ready to bake)
5. Preheat oven to 350 degrees and grease cookie sheet (or use silpat)
6. Roll dough into 1 inch balls, then roll them in powdered sugar. Place on a cookie sheet about two inches apart from each other. 
7. Bake at 350 for 10-12 minutes.

Chocolate Dipped S'mores


Ingredients
2/3 of the graham crackers from 1 box
1 bag semi-sweet chocolate chips
1/2 bag of marshmallows
Sprinkles

Directions
1. Cover cookie sheet in foil and heat oven to 400.
2. Break graham crackers in half or into quarters (whatever you prefer)
3. Place graham crackers on cookie sheet. Place a marshmallow on half of the graham crackers. Place chocolate chips (about 6 per half graham cracker) on the other half of the graham crackers on the cookie sheet.
4. Place cookie sheet in oven at 400 for 3-5 minutes (monitor very closely). Remove when marshmallows have gotten bigger and have started to brown very lightly and the chocolate chips are just starting to melt.
5. Remove cookie sheet from oven and place chocolate half on top of marshmallow half.
6. Melt remaining chocolate chips in microwave. Heat in a microwave safe bowl in 30 second increments, stirring each time. Dip s'mores in melted chocolate and place on parchment paper to dry. Add sprinkles if desired before the chocolate has hardened.
7. Let the chocolate harden and enjoy.

Tip: Adjust quantities of ingredients for the s'mores as desired based on the number you want to make.


Credit for the chocolate crinkle cookies goes to Chef in Training. Credit for the chocolate dipped s'mores idea goes to Tip Junkie.

Tuesday, November 27, 2012

Grilled Cheese with Avocado and Chicken

I was hoping I would have a recipe to share with Thanksgiving leftovers, but my family finished them off already! We didn't have much to start with...apparently we were all really hungry on Thanksgiving :). So instead, I'll share this really quick lunch or dinner idea--I had some leftover chicken in the fridge that I wanted to use and I found avocados at the store that looked delicious. So I decided to combine them both into this delicious grilled cheese sandwich.


Ingredients
2 slices wheat bread
2 slices provolone cheese
Half an avocado, sliced
Half a cooked chicken breast, sliced
1 tsp butter

Directions
1. Butter one side of each slice of bread. Place one slice on a skillet, butter side down and set the other slice aside. 
2. Slice chicken breast into this slices. Slice avocado into wedges. 
3. Place one slice of provolone on the bread slice in the skillet. Layer chicken slices and avocado slices on top. Add the next slice of provolone followed by the second slice of bread.

1st slice of break with cheese slice, chicken, and avocado
4. Grill each side of the sandwich in the skillet over medium heat until each side is golden brown and the cheese is melted.
5. Slice in half and enjoy the warm and delicious sandwich.

Sunday, November 11, 2012

Potato Chowder

Every year when the weather gets colder, I end up making a lot of soup...it tastes good, helps warm me up, and makes for great leftovers. Potato Chowder is one easy and delicious soup recipe I got from my mom. And I just made that today. Here's the recipe, I recommend giving it a try:


Ingredients
3 medium potatoes, peeled and cubed
1 1/2 cups chicken broth
1 1/2 cups sliced carrots
1 can (8 oz or 15 oz) whole kernel corn, drained
1 cup sliced celery
1/2 tsp thyme
Dash of pepper
2 Tbsp flour
1 cup milk
2 cups grated cheddar cheese

Directions
1. Combine potatoes and broth in large soup pot with tight-fitting lid. Bring to boil, then simmer until tender (about 10 minutes). 
2. Use fork to slightly mash up potatoes. You don't have to mash them up a lot, just break them apart a little.
3. Stir in carrots, corn, celery, and thyme. Cover and simmer until veggies are tender (about 15 minutes).
4. In a separate bowl, stir together milk and flour. Then add milk and flour mixture to the rest of the ingredients. Stir in cheese. A little bit of the cheese can be set aside to sprinkle on top of the soup; bacon bits are also good on top :).

Now serve and enjoy! 

Credit to my mom for sharing this recipe with my mom.

Sunday, October 28, 2012

Pumpkin Cookies and Cupcakes

With the leaves changing colors and Halloween coming up I felt like trying out some pumpkin desserts. I didn't have any recipes so I checked out one of my favorite blogs, skinnytaste and tried out these two recipes: Pumpkin Spice Cookies with Chocolate Glaze and Pumpkin Cupcakes with Pumpkin Spiced Cream Cheese Frosting. Everyone who tried these really liked them. The cookies especially were a big hit. Check out the recipes below:

Pumpkin Spice Cookies with Chocolate Glaze


Ingredients
4 oz 1/3 less fat cream cheese, softened
2 Tbsp unsalted butter, softened
3/4 cup packed brown sugar
1/4 cup sugar
1 egg
1/2 cup canned pumpkin puree
1/4 cup buttermilk
1/2 tsp vanilla extract
1 3/4 cup all-purpose flour
1/2 tsp pumpkin spice
1/2 tsp baking soda
1/2 tsp salt
1/4 tsp baking powder

For the chocolate glaze:
1/4 cup powdered sugar
1/2 Tbsp unsweetened cocoa powder
1/2 Tbsp milk
1/8 tsp vanilla extract
pinch of salt

Directions
1. Preheat oven to 350. Line baking sheet with silicone mat.
2. In a medium bowl, beat cream cheese, butter, and sugars together until light and fluffy. Add egg, beat well. Mix in pumpkin, buttermilk, and vanilla.
3. In another bowl, combine flour, spice, baking soda, salt, and baking powder. Gradually add to pumpkin mixture. Mix well.
4. Drop by round tablespoonfuls, 2 inches apart onto silicone lined baking sheet. Bake 12-14 minutes or until golden. Cool on wire rack.
5. For the glaze: Whisk the powdered sugar, cocoa powder, milk, vanilla, and salt in a bowl. Place in a ziplock bag. Seal the bag and but the point off of one corner and drizzle onto cookies.

Tip: Don't feel like buying buttermilk for just one recipe, use this alternative.


Pumpkin Cupcakes with Pumpkin Spiced Cream Cheese Frosting


Ingredients
Betty Crocker Golden Vanilla or French Vanilla Super Moist Cake Mix
2 tsp pumpkin pie spice
1 cup canned pumpkin puree
1 cup water

For the cream cheese frosting:
8 oz 1/3 less fat cream cheese softened
1/2 cup canned pumpkin puree
1 tsp vanilla extract
1 tsp cinnamon
1 tsp pumpkin pie spice
5 Tbsp packed brown sugar

Directions
1. Preheat oven to 350. Line a cupcake tin with cupcake wrappers.
2. Combine cake mix and pumpkin spice in a large bowl. Add pumpkin puree and water. Mix for about 2 minutes.
3. Fill cupcake liners 2/3 full and bake about 20-25 minutes, or until a toothpick comes out clean.
4. For the frosting, combine the cream cheese, pumpkin, vanilla, cinnamon, pumpkin pie spice, and brown sugar until smooth. Use a spatula to put the icing on the cupcakes.

Tip: These cupcakes are good enough without the frosting if you're looking for something more muffin-like rather than cake-like.


Credit goes to skinnytaste for both these delicious recipes.

Monday, October 15, 2012

Chili

Well I think the weather has officially indicated that it's fall now...personally I'm a much bigger summer person, but I do love the food that comes with fall: apples, corn, warm soup...the list goes on. With the weather getting colder, I was in the mood for something warm. And that something ended up being chili. This recipe is really easy (just takes 10-15 minutes of prep), and it makes some great leftovers...always a plus :)

Ingredients
1 to 1.5 lbs ground beef or ground turkey, browned and drained
1 can of dark red kidney beans, drained
1 can of light red kidney beans, drained
1 can of black beans, drained
1 can of pinto beans, drained
2 cans of stewed or diced tomatoes
1 small can of tomato paste
1 Tbsp chili powder
Tabasco sauce, to taste

Directions
1. Brown the meat in a big pot (a stockpot for example). 
2. After the meat is browned and drained, add the remaining ingredients. After adding all the ingredients, fill one of the tomato cans with water and add that to the pot. 
3. Stir all the ingredients together and let simmer for 30 minutes. You can simmer for longer than this if you like; the longer it simmers, the more flavorful it becomes. 
4. After simmering for 30 minutes, do a taste test and add any additional chili powder and/or Tabasco sauce to your liking.

Emily's Thoughts
The great thing about this recipe is that it's flexible and you can easily adjust it based on your taste. For example, I'm not a huge spice person, but I like a little Tabasco sauce in there, so I add some until it's spicy enough for me. Also, sometimes I like to add veggies to my chili. You can really add whatever you want, but I've used corn, carrots, zucchini, and green peppers in the past.

Some people like their chili plain, but personally I recommend serving yours over elbow macaroni, with cheese sprinkled on top, and a dollop of sour cream to top it off. 

Also, being that you're using a lot of canned items in this recipe, I recommend looking for low sodium beans at the store.


Now give this simple and easy recipe and enjoy it as the leaves and temperatures start to change this fall!

Wednesday, October 3, 2012

Peach Cobbler

I was recently watching something on TV (I can't remember what now),  and they were eating peach cobbler. That made me start to crave my mom's peach cobbler. So I got the recipe from her and decided to give it a shot. I thought it turned out deliciously. The recipe is really easy. The only time-consuming thing is peeling the peaches, and that doesn't really take that long. I highly suggest trying this recipe out :)

Ingredients
1/2 cup sugar
1 Tbsp cornstarch
1/4 tsp cinnamon
4 cups sliced and peeled peaches (about 6 medium)
1 tsp lemon juice
3 Tbsp butter or margarine
1 cup all purpose flour
1 Tbsp sugar
1 1/2 tsp baking powder
1/2 tsp salt
1/2 cup milk 

Directions
1. Heat oven to 400
2. Mix 1/2 cup sugar, cornstarch, and cinnamon in saucepan. Stir in peaches and lemon juice. Cook stirring constantly, until mixture thickens and boils.
3. Boil and stir peaches for 1 minute.
4. Pour into ungreased casserole dish or pyrex dish (the square size is good). Keep fruit mixture warm in oven.
5. In a separate bowl combine flour, 1 Tbsp sugar, baking powder, and salt. Cut butter/margarine into mixture until it resembles fine crumbs.
6. Stir in milk.
7. Drop dough by 6 spoonfuls onto hot peach mixture.
8. Bake until topping is golden brown, 25 to 30 minutes. Serve warm. 

Credit to my mom for making this recipe so many times over the years. And credit to Betty Crocker for giving the recipe to her initially. 

Sunday, September 16, 2012

The Food of Philadelphia and New Jersey

Ever since I met my friend Megan a couple years ago, she's been telling me how great the food is in her hometown in New Jersey. Her hometown is just outside of Philadelphia, so she's also been telling me how great the food in Philly is. Naturally, as a big lover of food, I've always wanted to try out these things Megan has been telling me about. And this past week I was in luck; I finally managed to make it out to Philadelphia for a visit and try out all of the delicious food the city has to offer. As I'm sure you can imagine, a Philly cheesesteak was the first on my list:

1. Philly Cheesesteak: I'm told that there are 2 places in the city to get the best cheesesteaks (Geno's and Pat's). I had a lot of other things to accomplish on my trip, so I didn't manage to make it to one of the 2 "top" places. But I did still manage to get a cheesesteak. I got mine at the Reading Terminal Market at Carmen's Famous Italian Hoagies and Cheesesteaks and it was delicious. The classic cheesesteak is with cheese whiz and onions. But these days you can get provolone cheese, peppers, and sometimes more on yours too. I opted to get provolone and peppers (both sweet and hot) on mine. Unfortunately, I was too excited to eat it and I forgot to take a picture. You'll have to take my word for it that mine looked something like the picture here that I found on google images ;)


2. Chickie's and Pete's Crab Fries: While in Philly, I also took the opportunity to go see a Phillies game. It was an awesome night with perfect weather and the Phillies won (always a plus). One food that's really popular at the stadium are Chickie's and Pete's crab fries. They were a tad too salty for me, but still tasted really great, especially with a beer.
Watching the game

3. Tommy Dinic's Pork and Beef: For part of my time in Philly I stayed downtown right by the Reading Terminal Market which is an indoor market full of lots and lots of different food options. One of those options is Tommy Dinic's. A coworker of mine (who is from Philly) told me that I had to try the pulled pork sandwich there. So I waited 20 minutes in line to get the delicious sandwich you see below. I only got provolone on mine but you can also get greens (i.e. spinach or broccoli rabe) or peppers. I thought the wait was definitely worth it.


4. Water Ice: The concept of water ice was perplexing to me when Megan told me about it. At first I thought she was describing a snow cone or a slurpee, but she assured me that that's not what it was. It's actually more like Italian ice or sorbet but it comes out of a soft serve ice cream machine. In either case, it was really good. I got halfway through eating it before realizing I forgot to take a picture (so forgive me for the poor quality). I got mango flavored, but they have other kinds like blue raspberry and root beer. You can also mix the water ice with ice cream. Megan ended up getting root beer water ice with vanilla ice cream. Hers was also delicious and tasted like a root beer float. Apparently there are different types of water ice, but Megan recommended Polish water ice, so that's what we had.

5. Manco & Manco's Pizza: Being from New Jersey, Megan naturally wanted to dispel my misconceptions about what is really the Jersey Shore. The prospect of a day at the beach sounded wonderful to me, so of course I agreed to go. We spent a few hours on the beach and then went to walk the boardwalk in Ocean City, NJ. On the boardwalk we got a slice of pizza at Megan's favorite place, Manco & Manco's. I always like a good slice of pizza, and I definitely enjoyed this one. I just went for their generic plain (i.e. cheese) pizza. But they have other options like broccoli (which is apparently really good), venetian, sicilian, and more.

On the boardwalk in Ocean City, NJ

6. Yuengling: If you ever make it out to Philly and try out all this delicious food, a great beer to pair with your food is a Yuengling. It's a lighter beer but has more flavor than something like Bud Light or Miller Lite. I'd never heard of Yuengling until I came out east and Megan told me to try it. It's by no means a craft beer, but this Philly beer is definitely a great choice.


So that concludes by Philly and New Jersey food/traveling experience. Philly sometimes gets a bad rap for being a dirty city, but I truly enjoyed myself. And it helped that I had a great travel guide (thanks Meg!). There are a bunch of things to do in Philly and I just gave you a lot of good food options above :)

Sunday, September 9, 2012

Chicken and Pasta Salad

This is kind of a new take on chicken salad and pasta salad, but it's really good and really easy. I can make it at the beginning of the week and then eat the leftovers for lunch throughout the week. 


Ingredients
2 cooked and diced chicken breasts
1 box of penne pasta
1 1/2 cups chopped celery
1 1/2 cups red grapes
3/4 cup mayo
1 Tbsp Dijon mustard
2-3 dashes lemon juice

Directions
1. Bake chicken at 350 for 40 to 50 minutes. After the chicken is done, cut it into diced pieces.
2. While chicken is cooking, cook the pasta. After you drain the pasta, run cold water over it cool it down.
3. Chop the celery and pick grapes off of the stems.
4. Combine chicken, pasta, celery, and grapes in a large bowl. Add the mayo, Dijon mustard, and lemon juice and mix everything together. 

You can easily adjust the quantities of each of the ingredients. If you want it to be more "saucy" just add a little more mayo and mustard. Or add more grapes if you like. The recipe is so easy, you can adjust it how you like or make it exactly how I did :)

Friday, August 31, 2012

Homemade Beer Bread

Fall is just around the corner...personally, I'm really sad to see summer go, but on the bright side, my favorite kind of beer is now available (yum, Oktoberfest....so delicious). In the spirit of good fall beers and continuing with my homemade series, I tried out this quick and easy recipe for beer bread. This is a great recipe to accompany with some warm fall soups.

Ingredients
3 cups flour (sifted)
3 teaspoons baking powder (omit if using Self-Rising flour)
1 teaspoon salt (omit if using Self-Rising flour)
1/4 cup sugar
1 can of beer (12 oz)
1/2 cup melted butter (you can use 1/4 cup if you prefer)

Directions
1. Preheat oven to 375 degrees
2. Mix dry ingredients and beer together. If you don't have a sifter for the flour, don't just pack it into the measuring cup (otherwise you're get really hard bread). Instead, spoon the flour into the measuring cup, so that the flour is less compacted.
3. Mix half of the melted butter into the dough.
4. Pour dough into a greased loaf pan. Then pour the rest of the butter over the top of the dough.
5. Bake 1 hour (I baked mine for 40 minutes since I used 2 small loaf pans). I recommend placing a sheet pan on the shelf below your loaf pan because some of the butter will probably spill over the edge.
6. After baking, immediately remove from pan and cool for at least 15 minutes.

Enjoy the hearty bread with a light beer taste :)

Credit for this recipe goes to Food.com

Wednesday, August 22, 2012

Homemade English Muffins


For the 4th edition of my homemade series, I decided to try out a recipe that kept popping up on Pinterest: Homemade English Muffins....I don't know about you, but I love Pinterest; I use it for recipe ideas all the time (if you haven't checked the site out yet, I highly recommend it). I found this recipe for Homemade English Muffins and figured it would fit perfectly with this series.

Ingredients
1 tsp active dry yeast
1 Tbsp sugar
1/2 cup milk
2 Tbsp butter
3 cups flour, divided
3/4 tsp salt
1/4 cup cornmeal
non-stick spray as needed

Directions
1. In a small bowl, combine the yeast, sugar and 1/2 cup warm water. Stir to dissolve the sugar and yeast. Let sit for 5 minutes or until foamy on top.
Yeast and sugar after getting foamy
2. While the yeast/sugar mixture is resting, combine 1 1/2 cups flour and the salt in a large bowl. Stir well to evenly distribute the salt. In a second small bowl, combine the milk and butter. Microwave the milk/butter for for 30 seconds at a time, stirring until the butter melts into the milk.
3. Pour the yeast mixture and the milk mixture into the flour. Stir until it has combined into a pasty mix. Now take the remaining flour (you should have 1 1/2 cups left) and add 1/4 cup at a time. You may not use all of the remaining flour. Stir in 1/4 cup at a tie until the dough forms a soft, slightly sticky ball that pulls away from the bowl. (I probably used about 1 cup of flour here)
4. Sprinkle a little flour onto a clean countertop and coat your hands in flour. Dump the soft ball of dough out of the bowl and knead it for 5 minutes (if you don't know how to knead dough like I didn't, check out this link). Don't be too liberal with the flour in this step; adding too much will result in tough muffins.
5. Shape the dough into a ball and place it in a bowl that has been coated in non-stick spray. Lightly spray the top of the dough and cover with plastic wrap. Let rise until double in size (about 45 min - 1 hour)
The dough covered to let rise

6. Punch the dough down, shape it into another ball, cover the bowl/dough and let rise a second time (45 min - 1 hour or until double in size)

7. Punch down the dough again and turn it out onto a well floured countertop. Using a rolling pin, lightly roll the dough until it is about 3/4 inch thick. Use a round cookie cutter, biscuit cutter, or round drinking glass to cut the dough into circles. When you can't cut out anymore circles, gently ball the remaining dough, roll again, and cut more.

8. Place the cut dough circles onto a sheet pan that has been liberally covered in cornmeal. Sprinkle more cornmeal on top of the muffins. Cover loosely with a damp towel and let rise, once more, until double in size (about another 45 min).
The cut out muffins on a cookie sheet before rising
9. Heat a large skillet over medium-low heat. Spray the pan with non-stick spray. Carefully transfer the fluffy, risen muffins to the hot skillet with a spatula. Cook the muffins in batches in the skillet until they are golden brown and crispy on each side. Make sure to keep the heat low so that the outside browns slowly, allowing time for the inside to bake. It took about 5-7 minutes for each side with mine.
One side is cooked, cooking the other
10. Let the muffins cool on a wire rack before slicing.

Emily's Thoughts
Overall I thought this was a fun recipe to try (who knew you baked English muffins without the oven?!). It's not very hard, but it does take a decent time commitment--not for the physical baking, but for waiting for the dough to rise. If you want to try making something homemade that your normally never would, this is a good recipe to try. And the muffins taste good. 


Credit for this recipe goes to the Budget Bytes blog.

Wednesday, August 8, 2012

Homemade Peanut Butter

Continuing with my "homemade" series, where I cook things I would normally always buy at the store, I made homemade peanut butter. Three words for this recipe: simple, easy, delicious. I'm a big peanut butter lover, do so I just had to try out this recipe. And I highly recommend it. 
There are so many ways you can enjoy peanut butter :)


Ingredients
8 oz salted party peanuts or shelled and skinned roasted peanuts
1/4 teaspoon very fine salt (only if peanuts are not salted)
1 to 1 1/2 teaspoons honey
1 to 2 teaspoons peanut oil (extra virgin olive oil works fine if you don't have peanut oil)

Special Tools: food processor


Directions
1. Put the peanuts, honey, and salt into the bowl of the food processor. Process until mixture is fine peanut pieces.
The mixture before adding oil
2. Add oil through the opening at the top of the food processor or all at once. Place the lid back on and continue to process until the mixture is smooth--about 2-3 minutes. (more processing produces smoother peanut butter)
The final product

Storage: store peanut butter in an airtight container in the fridge

Thanks to The Redhead Riter for the recipe!

Sunday, July 29, 2012

Homemade Granola Bars #2

For the second post of my "Homemade" series, I tried out another granola bar recipe. I found this one on allrecipes.com. They have a more of a sweet taste than the first granola bar recipe because of the chocolate chips. I made them for my family and they all loved them. And this is really easy!

Ingredients
2 cups rolled oats
3/4 cup packed brown sugar
1/2 cup rice krispies
3/4 teaspoon ground cinnamon
1 cup all-purpose flour
3/4 cup mini chocolate chips
3/4 teaspoon salt
1/2 cup honey
1 egg, beaten
1/2 cup vegetable oil
2 teaspoons vanilla extract

Directions
1. Preheat the oven to 350 degrees. Generously grease a 9x13 inch baking pan.
2. In a large bowl, mix together the oats, brown sugar, rice krispies, cinnamon, flour, mini chocolate chips, and salt. 
3. Make a well in the center, and pour in the honey, egg, oil, and vanilla.
4. Mix well using your hands. Then evenly pat mixture into the prepared pan.
5. Bake for 30-35 minutes in the preheated oven, until the bars begin to turn golden at the edges. Cool for 5 minutes, then cut into bars while still warm. 
*Don't allow the bars to cool completely before cooling, or they may be too hard to cut. 

Recipe adapted from allrecipes.com

Saturday, July 21, 2012

Homemade Granola Bars #1

I don't know about you, but there are certain things that I always buy at the store and would never bother making on my own. One of these things is one of my favorite snacks, granola bars. So I decided to start a "Homemade" series; I'm going to try making things I always buy at the store. Since I've never done this before, I'll be adjusting other recipes I've found.

To kick off the series, I tried out 2 granola bar recipes. Here's the first one that I found from the Food Network, I think these ones are fairly similar to Kashi Chewy Granola Bars:

Ingredients
2 cups old-fashioned oatmeal
1 cup sliced almonds
1 cup shredded coconut, loosely packed
1/2 cup toasted wheat germ
3 Tbsp unsalted butter
2/3 cup honey
1/4 cup light brown sugar, lightly packed
1 1/2 tsp pure vanilla extract
1/4 tsp salt
3/4 cup raisins
3/4 cup craisins (dried cranberries)

Directions
1. Preheat oven to 350 degrees. Grease a 9x13 inch pan and line it with parchment paper.
2. Toss the oatmeal, almonds, and coconut together on a separate sheet pan and bake for 10 to 12 minutes. Stir occasionally, until lightly browned. 
3. Transfer the mixture to a large mixing bowl and stir in wheat germ.
4. Reduce oven temperature to 300 degrees.
5. Place the butter, honey, brown sugar, vanilla, and salt in a small saucepan and bring to boil over medium heat. Cook and stir for a minute, then pour over the toasted oatmeal mixture.
6. Add the raisins and craisins and stir well.
7. Pour the mixture into the 9x13 pan. Wet your fingers and lightly press the mixture evenly into the pan.
8. Bake for 25 to 30 minutes, until light golden brown. Cool at least 2 to 3 hours before cutting into squares. Serve at room temperature. 

Emily's Thoughts
I made this recipe at my parents' and my whole family ate them up. The bars didn't hold their shape perfectly, but they still tasted really good! The other great thing about this recipe is that you can change it around a little if you want. Don't like coconut or almonds? Use other types of nuts. Want to add dates and apricots? Adjust the amount of raisins and craisins or just replace them all together. And this is really easy! I think I'll start making my own granola bars more often.

Recipe adapted from the Barefoot Contessa.